Every receipt you type into a spreadsheet is time you're not spending on actual work. Spreadsheet Agent handles this — upload receipts, AI extracts the data, auto-categorizes it, and pushes clean rows to your Google Sheet.
Whether you need an expense tracking spreadsheet for freelance work or a full business expense tracking spreadsheet for your company, here's how to set one up that populates itself.
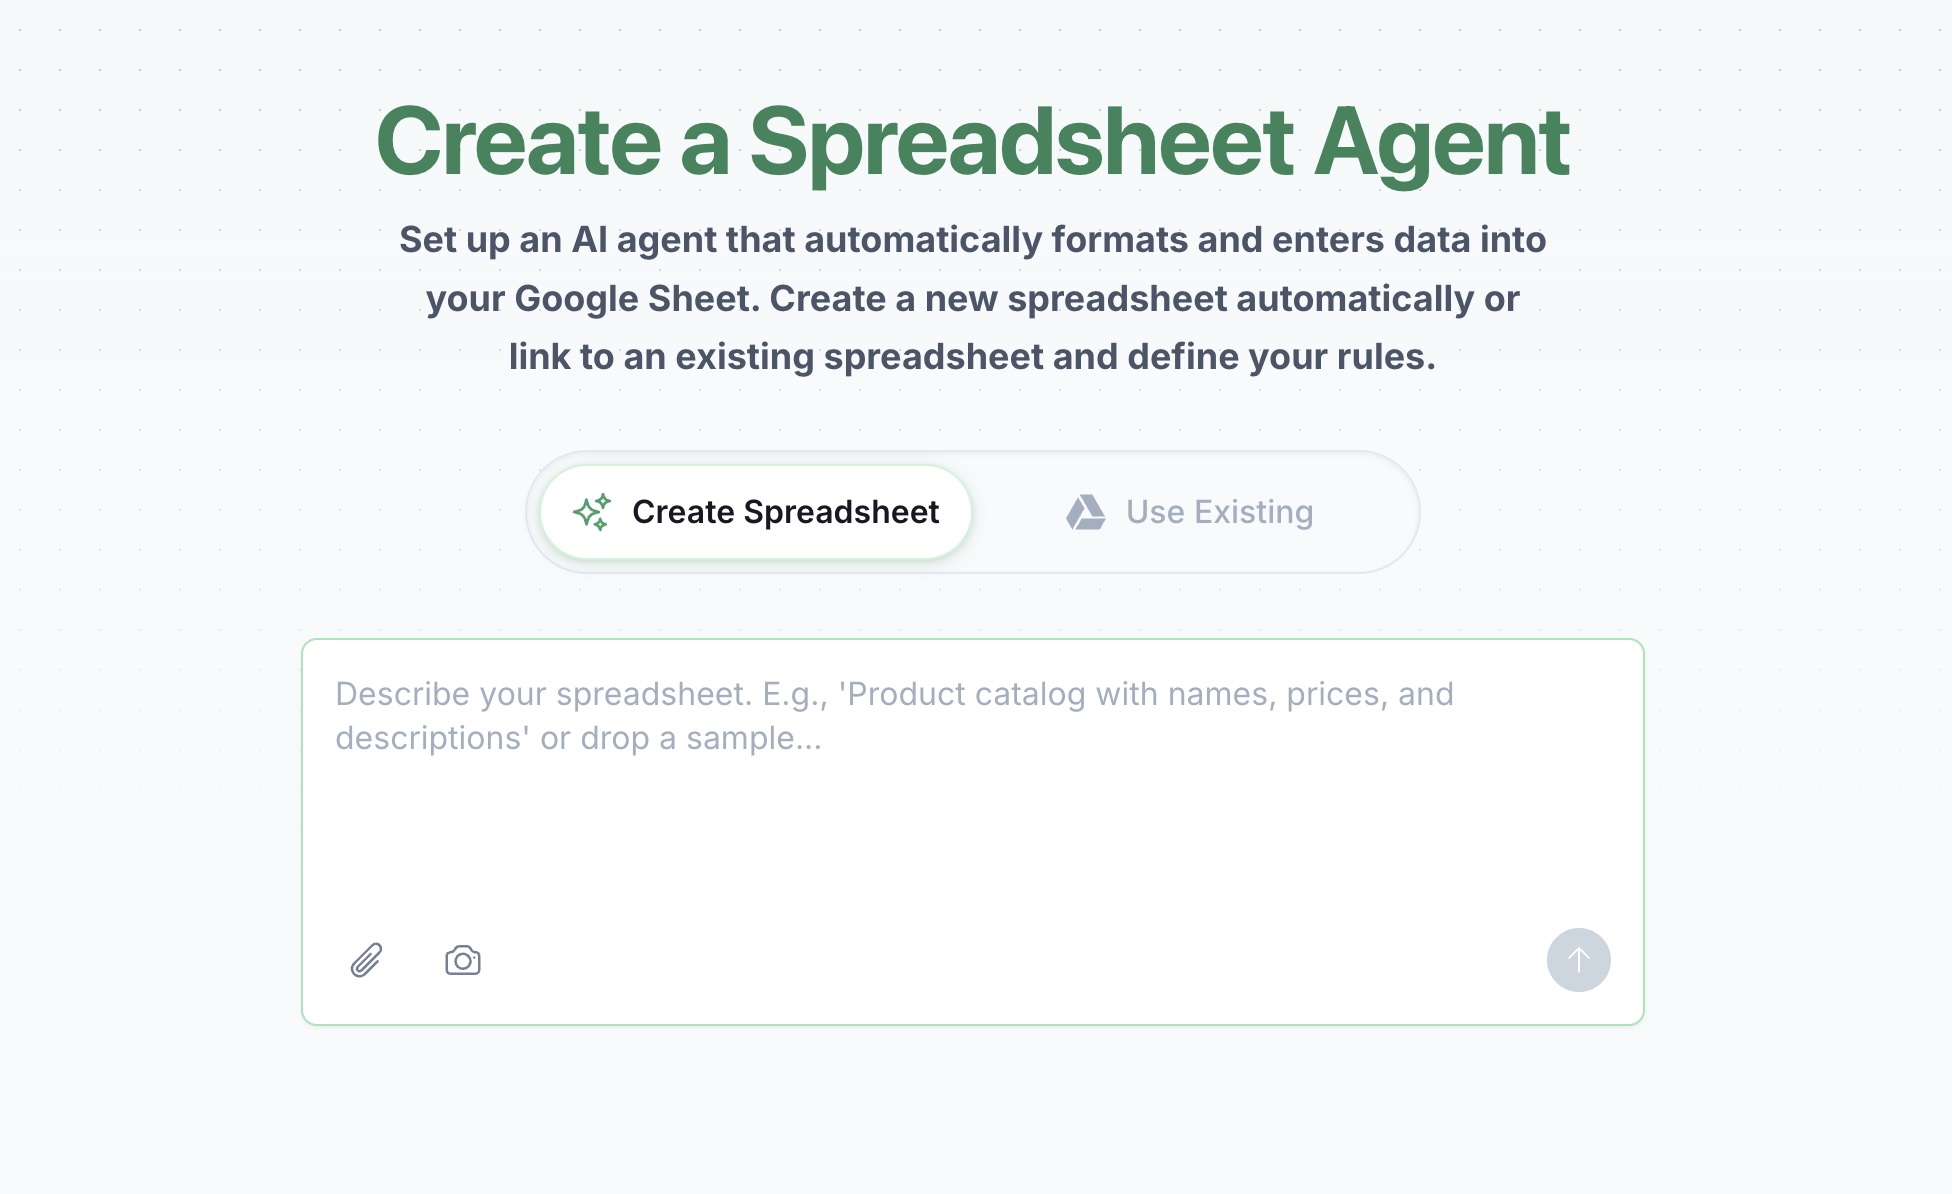
Step 1: Create Your Expense Tracking Agent
Instead of starting with an empty expense tracking spreadsheet and typing everything manually, open Spreadsheet Agent and describe what you need:
"Business expense tracker with date, vendor, description, amount, category, and payment method. I'll upload receipts and invoices."
Spreadsheet Agent generates the column structure automatically. You can also connect an existing Google Sheet if you already have one. For a full walkthrough of the setup process, see the agent setup guide.
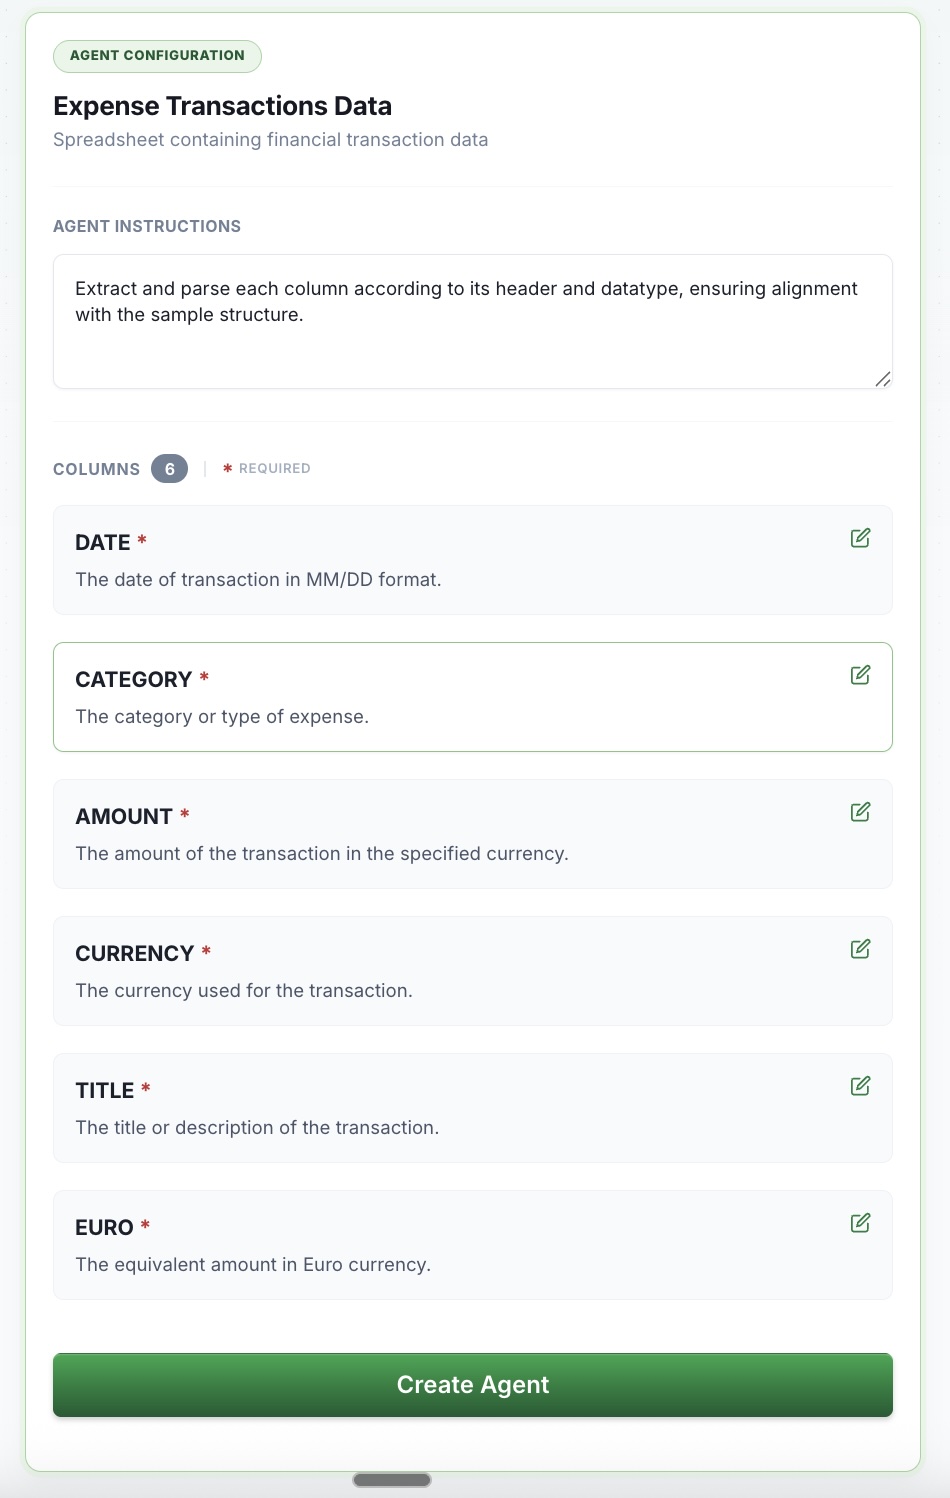
Step 2: Configure Your Expense Categories
After creation, you'll see your column configuration. This is where you fine-tune how AI extracts and formats your expense data.
For the Category column, click to edit and add your expense categories:
- Software & Subscriptions
- Office Supplies
- Travel
- Meals & Entertainment
- Vehicle/Fuel
- Professional Services
- Advertising
- Equipment
Step 3: Set Up Auto-Classification
This is where Spreadsheet Agent saves you hours. In the column edit modal, add instructions that tell AI how to categorize expenses automatically:
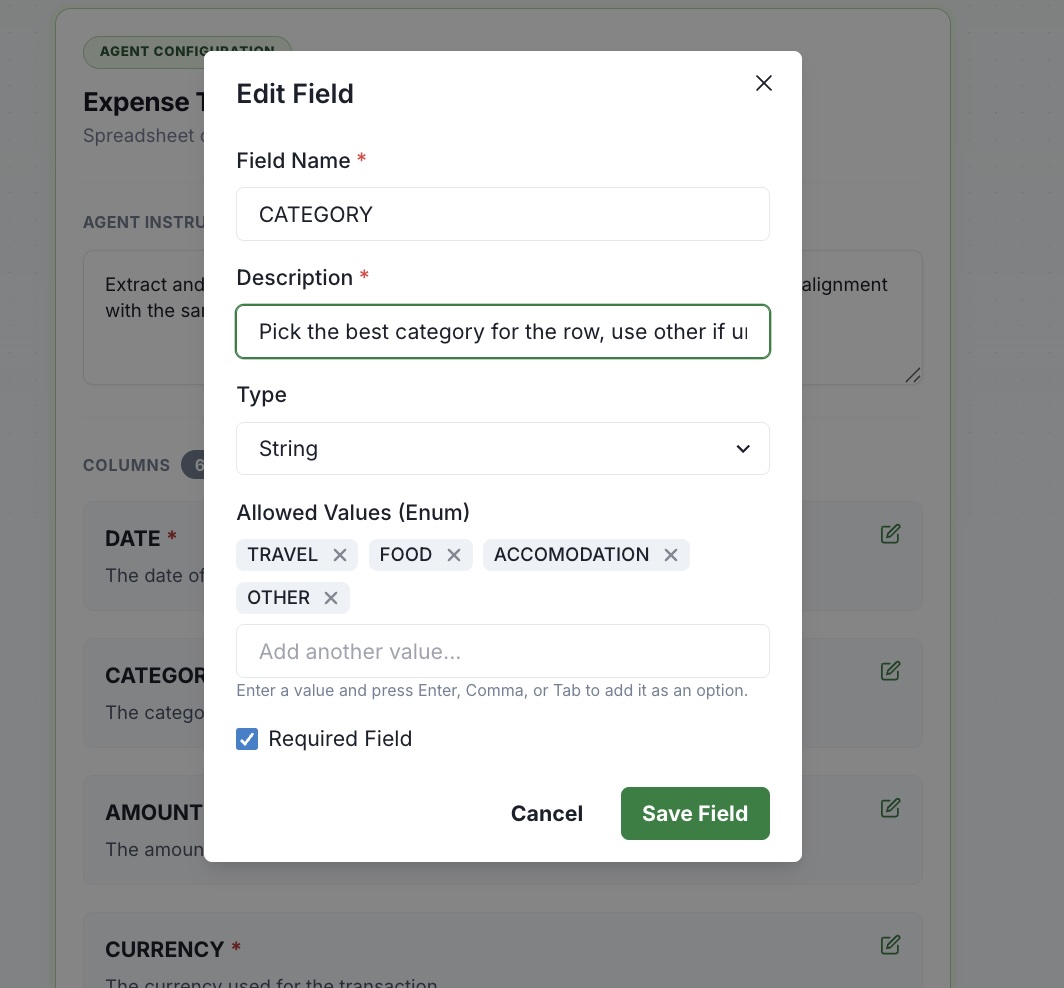
Now every receipt you upload gets categorized automatically. No more selecting from dropdowns for each expense.
Step 4: Upload Your Receipts
Go to your agent and upload your expense documents one at a time. Spreadsheet Agent handles multiple formats:
- PDFs — Upload invoices, statements, and digital receipts
- Images — Photos of paper receipts, screenshots of online orders
- Text — Paste email receipts directly
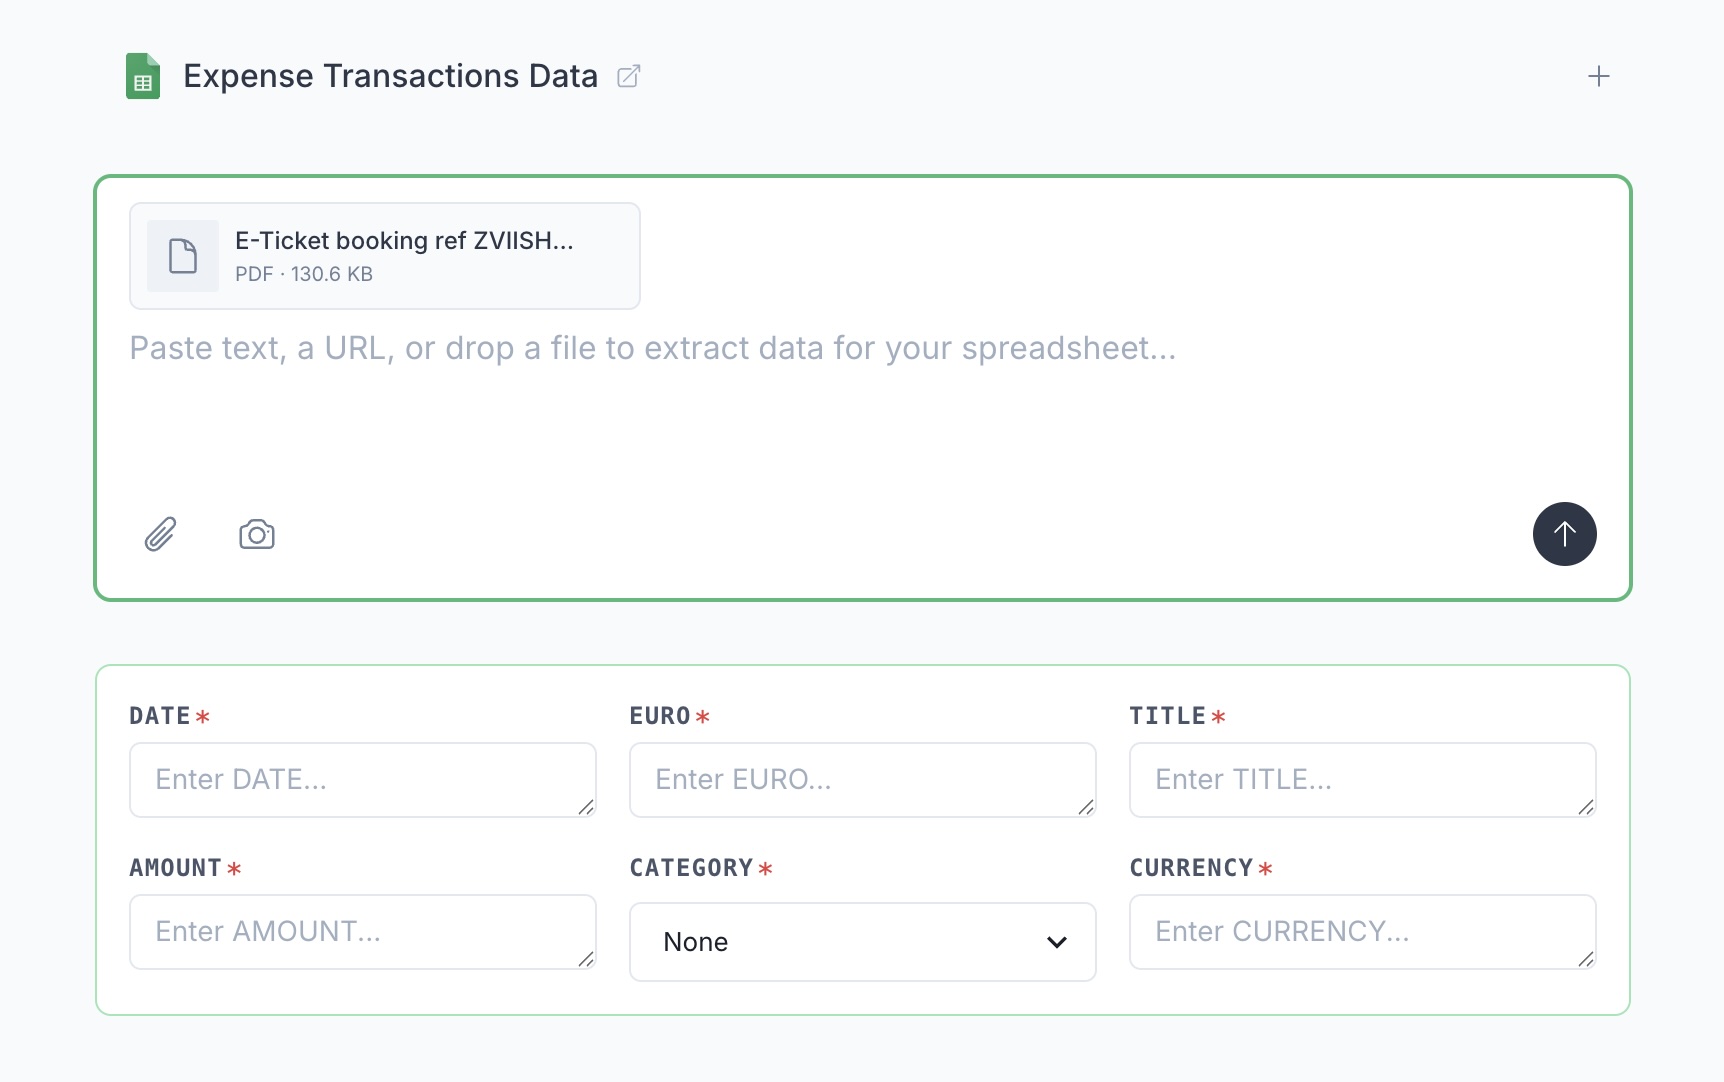
AI reads the document and extracts the date, vendor name, line items, total amount, tax, and payment details. The category field auto-populates based on your classification rules.
Step 5: Review and Insert
Before anything hits your spreadsheet, you see a preview of the extracted data. Check that everything looks right — vendor name, amount, category. Edit any fields if needed.
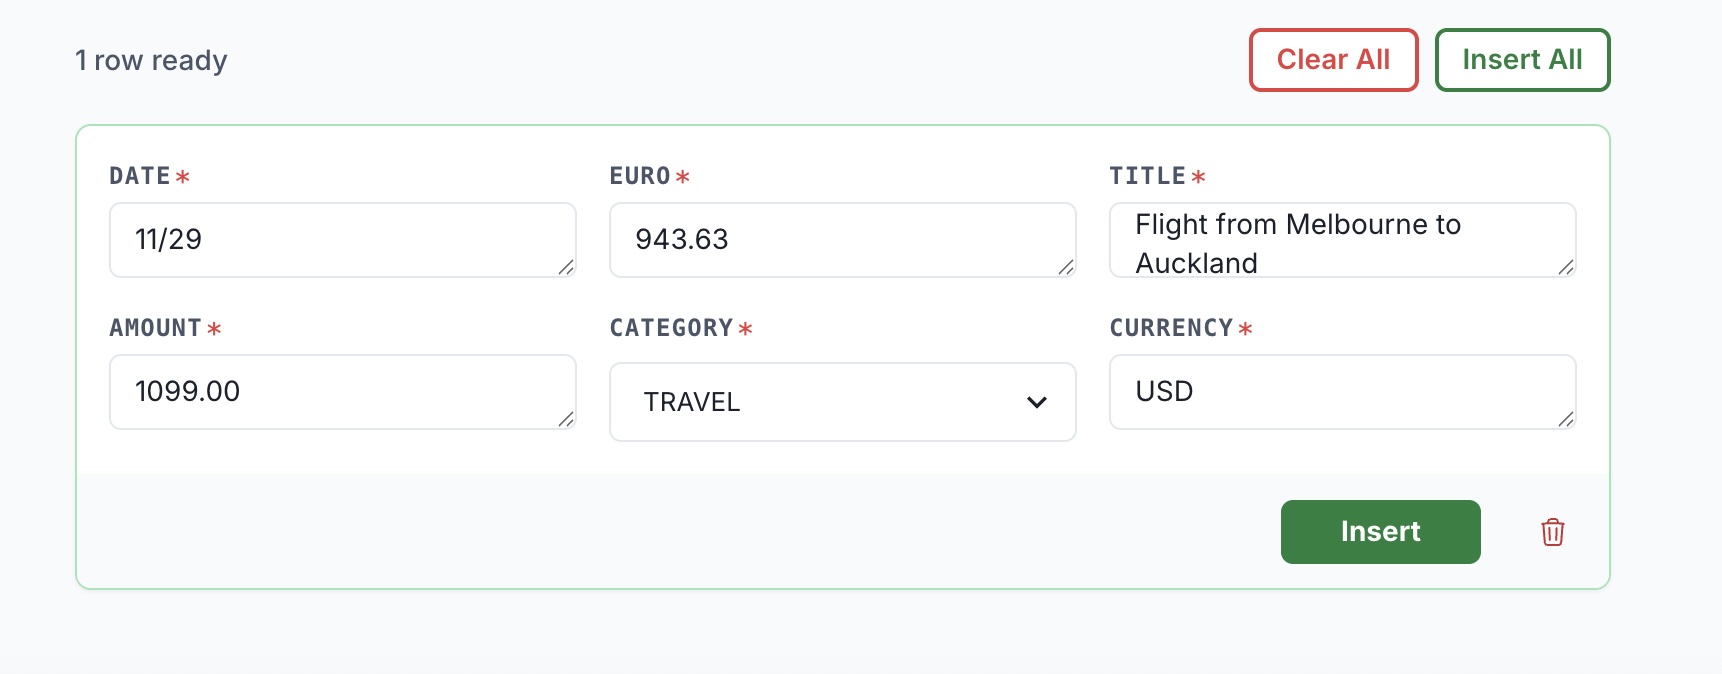
Click Insert. The expense row appears in your Google Sheet — properly formatted, categorized, and ready for tax time.
Stop Typing Expenses
An expense tracking spreadsheet only works if you actually keep it updated. Manual data entry is the reason most people don't. Set up your expense tracking agent, configure auto-classification once, then just upload and review. Get started with Spreadsheet Agent.